How Drying, Jars, and Freezers Came to Hold a Summer Tomato
Sun and dry air were the earliest tools for keeping a late-summer harvest through winter. Generations of cooks halved ripe fruit, laid it out in hot seasons, and let evaporation pull the moisture away until spoilage had nothing left to feed on. Much later, heat-processed sealed jars entered ordinary home kitchens, allowing cooks to boil the fruit and store it on a dark shelf without needing a root cellar full of fresh produce. Then came the domestic freezer, opening a third path that preserves the harvest with a brief blanch or no cooking at all.
When a heavy basket lands on the counter today, the choice of method still shapes your winter nutrition and your kitchen rituals. Prolonged heat and lost water treat vitamin C and lycopene differently, the harvest shrinks dramatically only when water leaves the fruit, and your storage destination becomes either a cool cupboard, an airtight dry jar, or an appliance that must stay connected to the grid.
For a busy household practicing seasonal eating, the smartest working plan is straightforward: freeze the bulk of your cooking tomatoes if you have the cold space, dry a small share of the ripest fruit for deep umami intensity, and can only the portion that must survive on a shelf without electricity.
What Heat and Lost Water Do to Vitamin C and Lycopene
Inside the kitchen, every preservation method is a quiet negotiation with heat, oxygen, and water. How you handle the fruit on cutting boards and stovetops directly alters what ends up in your winter stews.
Vitamin C dissolves in water and degrades when exposed to oxygen and sustained high temperatures. Because water-bath or pressure canning requires a prolonged heating cycle to make the jar shelf-stable, it causes greater initial vitamin C losses than the brief preparation used for freezing. In fact, directions from the National Center for Home Food Preservation allow you to freeze raw tomatoes, with or without their skins, avoiding heat exposure entirely before storage. Keep in mind, though, that frozen tomatoes continue to undergo slow chemical changes in the freezer, so even a raw-packed bag holds its peak vitamin C for a season rather than forever.
Lycopene tells a very different story. This fat-soluble carotenoid stays bound largely to the tomato solids rather than dissolving into the watery juice. While lycopene can still degrade during rough processing or long storage, cooking heat actually shifts its structure in a way that makes it more accessible during human digestion. Drying takes a separate route: removing water crowds those existing tomato solids into a much smaller weight and volume. A leathery dried half tastes intensely savory and packs concentrated solids into every bite, though the dehydrator simply condenses the lycopene that was already present in the fresh fruit.
Retaining the Liquid Gold
Whenever you slice or heat tomatoes, water-soluble compounds migrate into the surrounding juice. Draining cut fruit in a colander or packing jars with plain water that you later pour down the sink throws away valuable nutrition. When your tested canning directions permit packing tomatoes in their own juice, keep that liquid with the fruit—and stir every drop of it into your eventual soup or sauce.
What One Harvest Basket Becomes in Jars, Trays, and Bags
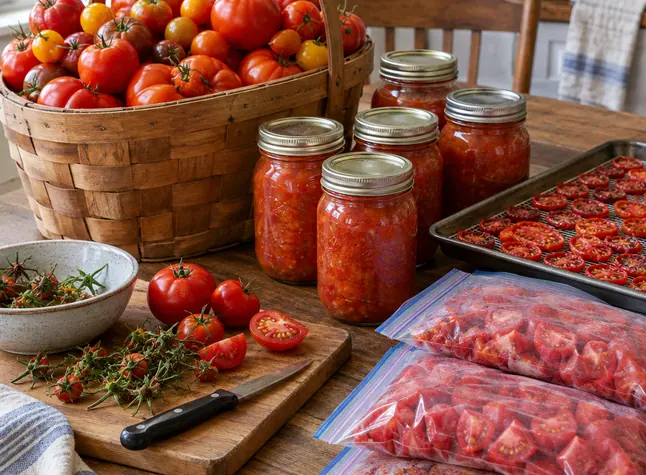
Look at a single overflowing harvest basket on the kitchen table. Before any preservation begins, your paring knife takes the first cut of volume: stems, tough cores, and—depending on the recipe—peels leave the pile for the compost bin. What happens to the remaining bulk depends entirely on whether you keep the tomato's natural water or drive it into the air.
The Canner Load
Canning keeps your harvest close to the volume of the peeled, cored fruit plus whatever packing liquid surrounds it. Heating releases trapped air from the tissues and causes the pieces to settle inside the glass, so the apparent volume drops slightly from the raw pile on the counter, even when you retain all the juice. Because whole tomatoes, crushed packs, and simmered sauces hold vastly different amounts of water, the final count of jars on your towel always reflects the specific cut and pack style you choose.
The Dehydrator Trays
Drying collapses the basket completely. Because a fresh tomato is mostly water, hours of warm airflow shrink trays of plump halves down to a few small jars of dark, concentrated pieces. How much remains at the end depends on the fleshiness of the variety, the thickness of your slices, and how far you take the final dryness. Paste varieties with thick walls and small seed cavities leave behind more chewable flesh per tray than watery slicing types.
The Freezer Stack
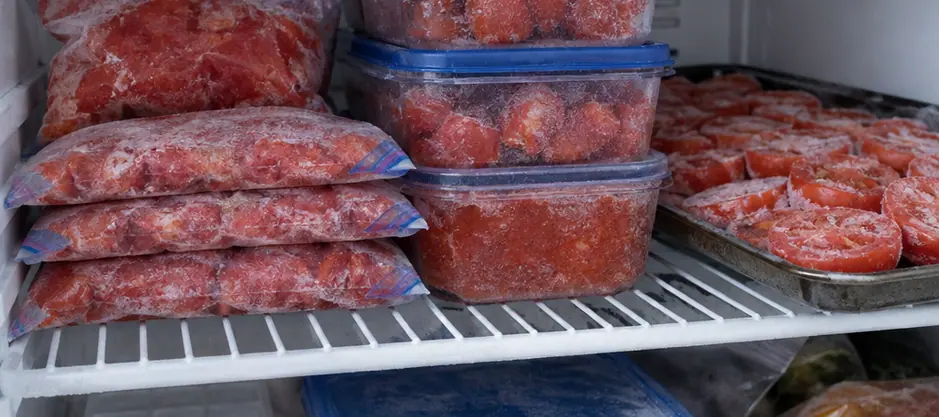
Freezing holds the fruit near the exact volume you packed at the counter. None of the water evaporates, so your only real constraint is cubic space inside the freezer compartment. Furthermore, water expands as it crystallizes into ice; when packing rigid containers or zip-top bags with juicy or crushed fruit, leave the headspace specified by your freezing guide so seams stay intact as the batch hardens.
Stove Time Now, and Whether the Food Needs Power Later
Mindful sourcing extends beyond the farmers market to how you spend your own afternoon energy and household power. Each preservation path trades upfront kitchen labor against long-term storage demands.
- Canning demands one hot, focused stove session: You spend hours peeling, acidifying, boiling, and listening for lids to ping, then pay zero energy costs to hold the food through winter. According to the National Center for Home Food Preservation, properly home-canned tomatoes keep their best quality when used within one year and stored in a clean, cool, dark, dry cupboard—preferably between 50°F and 70°F (10°C to 21°C). Before opening any jar, inspect it to confirm the vacuum seal remains tight and flat.
- Drying asks for long equipment runtime, then dry air: While ancestral cooks relied on fierce, arid sunlight, a modern electric dehydrator gives home kitchens a controlled, dependable climate regardless of late-summer humidity. Extension tomato-drying guidance commonly uses a dehydrator setting of 140°F (60°C), with an estimated drying window of 10 to 18 hours. Always judge completion by the tactile texture of the fruit rather than the clock alone. Once cooled and sealed in dark, airtight glass, the batch ignores power outages entirely; ambient moisture and light are the only enemies left to guard against.
- Freezing trades brief prep for continuous electricity: You can wash, core, and bag a huge haul in under an hour, handing all the remaining work to your freezer compressor. Extension guidance commonly gives frozen tomatoes an 8- to 12-month window for best quality when held continuously at 0°F (-18°C) or below. That window marks peak flavor and color rather than a hard safety expiration, provided the appliance stays cold without interruption.
Pick the Method for the Meal, Then Use a Tested Canning Process
Instead of staring at a mountain of fruit and wondering which appliance to pull out first, work backward from the winter meals you actually cook on weeknights.
- For simmered sauces, chilis, and pot roasts: Both canned jars and frozen bags excel here. Freezing ruptures the cell walls of the tomato, softening its structure completely upon thawing. While that makes thawed pieces unsuitable for a raw salad slice, it turns them into effortless cooking ingredients that melt straight into a warm Dutch oven.
- For a rich punch over morning eggs, grain bowls, or sourdough toast: Reach for dried tomatoes. Rehydrated briefly in warm broth or olive oil, or snipped directly into a skillet, they bring dense, savory depth without watering down the pan.
- For quick skillet dishes that need a bright, fresh-cooked profile: Use frozen pieces that went into the bag raw or briefly blanched. Skipping the long boiling cycle of a canner preserves a lighter, summer-bright aroma when the fruit hits hot garlic and oil.
Matching Safety Steps to Your Method
Once the meal dictates the method, execution comes down to a few non-negotiable details in the kitchen. For drying, run the dehydrator until the pieces reach the leathery-to-brittle endpoint described in your guide, checking thickest edges to ensure no moist pockets remain. Let the pieces cool completely on the trays before sealing them into jars so residual warmth does not trap condensation inside the glass.
When canning, safety rests entirely on science. Tomato acidity varies significantly by variety, soil, and late-season ripening conditions, and a tart taste on your tongue never guarantees a safe pH inside a sealed jar. Likewise, a tight vacuum lid only keeps outside air from entering; the shelf-storage recommendation holds only when you follow tested tomato-canning directions from the National Center for Home Food Preservation, because an improvised recipe, omitted required acid, or guessed processing schedule can leave a sealed jar unsafe. Select your exact product and pack style first, then follow its specific acidification, jar size, altitude adjustment, and boiling-water or pressure-processing schedule to the letter.
Freeze the Bulk, Dry a Little, Can What Must Live Without Power
When the counters are covered in red and gold fruit, stand behind a single, deliberate allocation that honors both your time and your winter table. Give the largest share of your cooking tomatoes straight to the freezer: core sound fruit, pack it into meal-sized portions in freezer-safe bags, press them flat before freezing so they stack like books and thaw quickly, and label every bag with the product and packing date. Next, pull aside just enough ripe, blemish-free paste tomatoes to fill one dehydrator load—never use preservation to rescue moldy or decaying fruit—and turn that tray into a single jewel-box jar of concentrated dried halves for winter grains and eggs.
Reserve the hot stove work of canning strictly for the jars you want standing ready in the pantry without relying on the electrical grid, and run those batches through a current, tested acidification and processing schedule. Date every jar and bag, rotate the oldest batches to the front of the shelf or freezer drawer, and let the season feed the meals you genuinely love to cook.