Soft Bread or a Tough Disc: What Actually Decides It
A rushed dough and a careless skillet can leave dinner resting on a pale, leathery disc. Push the heat harder and the surface scorches before the center sets. Bread intended to make a simple meal satisfying becomes another chore.
Four decisions carry this yeast-free flatbread: mix to a soft, slightly tacky feel; give the dough a proper covered rest; cook in a heavy skillet over steady heat; and check texture after mixing and toasted-flour aroma during cooking. Together, these give the cook useful cues for bread that bends at the table.
The method needs no yeast, second rise, or specialty pan. Its two sensory checks fit inside work already underway, without a separate mindfulness routine layered over dinner.
For a weekday meal, the covered rest creates a useful opening: slice a ripe tomato, gather herbs, or rinse the mixing utensils. These small kitchen rituals make room for attention without asking the cook to spend the evening at the stove.
Mixing a Dough You Can Read With Your Fingers
Begin with all-purpose flour so the starting quantities and dough cues refer to the same ingredient. Mindful sourcing can guide the flour purchase; once mixing begins, the dough itself guides the water.
A Two-Cup Starting Dough
- About 2 cups all-purpose flour
- 3/4 cup warm water, with roughly 1 tablespoon held back initially
- 1 teaspoon fine salt
- 1 tablespoon oil
These quantities provide a home-cook starting point rather than a fixed bakery specification. Whole-wheat flour generally needs more water and produces a denser round. Flour storage and kitchen dryness can also change how this mixture feels.
- Combine the flour, salt, and oil. Add most of the measured warm water while stirring. Expect a shaggy mixture with loose flour and uneven clumps.
- Work the dry patches into the dough. Squeeze and fold the mixture, adding the reserved water gradually as needed. Avoid pouring it all in simply because the measuring cup still contains some.
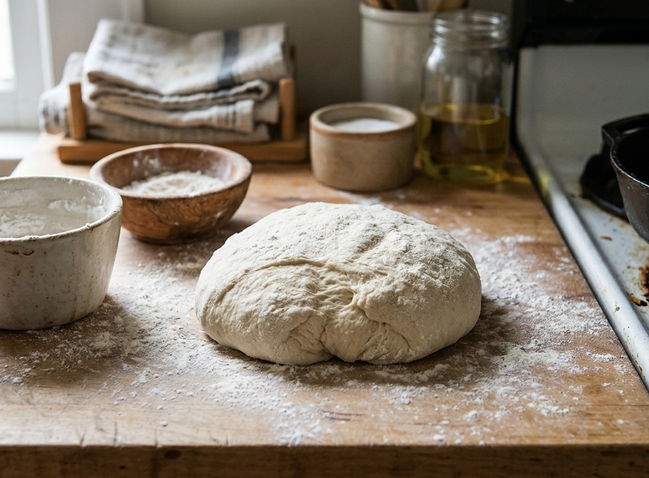
- Knead until the dough holds together. Allow approximately 3–5 minutes, using feel as the endpoint. The ball should feel soft and slightly tacky, with no cracked seams or broad sheets of wet dough clinging to the bowl.
Flour and water form the structure. Salt seasons the bread and strengthens the dough slightly. Oil tenderizes the bread, helps it remain flexible, and supports surface browning in the skillet.
Keep Flour Untasted
Check raw dough with clean fingers, never by tasting it. Flour is a raw ingredient; this bread is intended to be eaten cooked.
The Covered Rest That Softens the Dough
Cover the bowl immediately after mixing and leave the dough at room temperature for 20–30 minutes. This rest belongs in the recipe. Keeping the surface covered helps it stay supple while water distributes through the flour and the worked dough relaxes.
At the end of the rest, the surface may look a little duller. Press a portion outward: it should spread with less resistance and hold its shape more readily. Before cooking, its aroma remains mild flour and oil; the toasted smell comes later.
Divide the batch into 8 pieces. Roll or pat each into a round approximately 6 inches across and 2–3 millimeters thick. Keep the waiting pieces covered while working on one.
Let Spring-Back Settle
If a round contracts sharply or tears as it spreads, cover it for another 5–10 minutes. Repeatedly forcing it outward and dusting it with flour can turn resistant dough into a dry, tougher skillet round.
Use only enough flour on the work surface to manage sticking. A round that keeps pulling inward needs time to relax before another shaping attempt. The useful test is whether it spreads without a struggle.
Skillet Heat, Oil, and the One Flip
A heavy cast-iron or other thick skillet steadies the cooking surface. Thin metal develops hot spots more readily and can scorch the outside before the center sets. This method assumes a steady home burner; restaurant-griddle timing offers little guidance here.
- Preheat over medium heat. Begin with 3–5 minutes, watching the pan rather than treating the clock as the endpoint. If using a water-drop check, do it before adding oil: a small drop should skitter and evaporate promptly. Let the surface dry completely.
- Apply a light film of oil. Hold a lightly oiled paper towel with tongs and wipe the cooking surface. Leave a sheen rather than a puddle. Never splash water into hot oil.
- Lay in one round. For bread 2–3 millimeters thick, start checking the underside after 60–90 seconds. Look for irregular golden-brown spots, a top that has turned matte, and scattered puffs.
- Flip once and finish. Start checking the second side after 30–60 seconds. Look for toasted spots, set surfaces, and an edge that bends. Transfer the cooked round directly to a stack beneath a clean cloth.
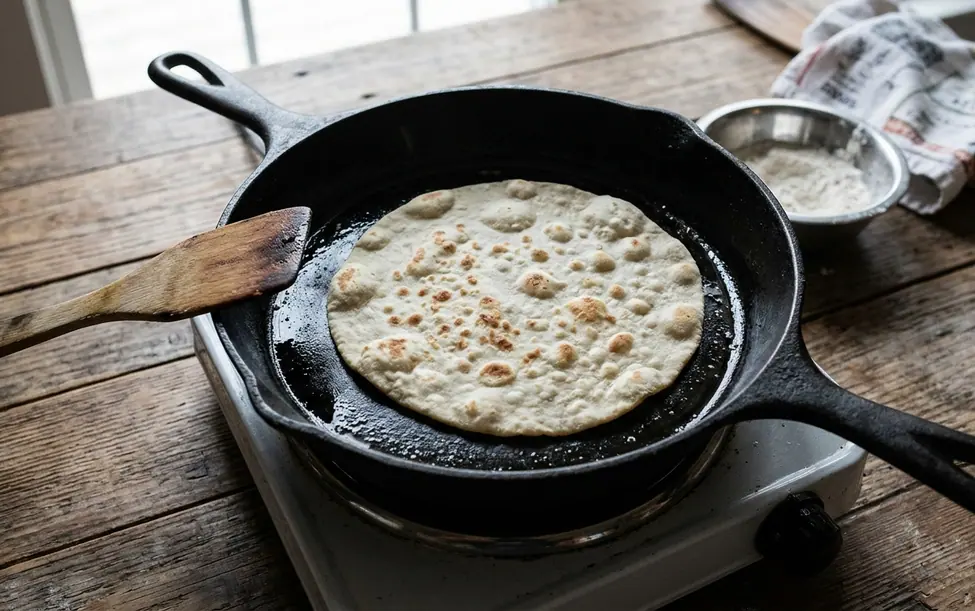
A cool skillet leaves the bread pale while it dries. Immediate blackening or smoking signals excessive heat: reduce the burner before adding the next round. Burner behavior changes timing, so surface color and a set center matter more than finishing on schedule.
Keep each finished round under the cloth as the batch grows. That covered stack retains moisture while the remaining bread cooks.
Two Pauses for Texture and Toasted-Flour Aroma
The first notice happens just before covering the mixed dough. Press once and register the difference between slightly tacky, dry and cracked, or wet enough to smear broadly. That small check helps settle the water decision before the rest begins.
The second belongs to the first side’s cooking interval. As the flour aroma becomes toasted, lift an edge and inspect the underside. Aroma supports the visual check; it cannot establish doneness on its own. Look for matte gold spots alongside the set surface and scattered bubbles.
Attention Serves Dinner
Both observations use time already inside the recipe. They help the cook adjust water and heat while keeping attention on the food that will reach the table.
Nutrition and seasonal eating become tangible in the serving: warm bread, olive oil, a pinch of salt, and sliced ripe tomato or herbs already in the kitchen. These ingredients give the cook something distinct to taste alongside the toasted flour.
The wellness value here stays modest and practical. A familiar staple receives care through seasoning, steady heat, and serving while flexible. Attention makes room to enjoy the meal without turning dinner into a performance.
Tuesday, Still Warm, Torn at the Table
Picture Tuesday in a narrow galley kitchen. The cast-iron skillet ticks as it cools. A cook lifts the cloth from a stack of yeast-free flatbread and carries one round to the table, where olive oil, a pinch of salt, and sliced tomato wait.
The bread bends around the tomato without its edge cracking. Someone tears off a piece; the toasted-flour smell still hangs near the stove. Dinner has taken shape around what was already on hand.
The remaining rounds cool beneath their cloth, then go into a wrap while still soft, once their warmth has escaped. The mixing bowl, emptied and rinsed during cooking, sits clean beside the sink. Only the skillet awaits washing; the wrapped bread rests nearby for the next meal.